Quick guide on how to install and use Lightroom Mobile Presets (scroll down for more details with screenshots)
Let’s start with a brief overview of the necessary steps:
- Download the DNG file onto your mobile
- Open Lightroom Mobile App
- Import DNG file into your Lightroom Mobile App on your Smartphone
- The imported DNG file will show up as an image in LR Mobile
- Click the three dots in the upper right corner and save Preset
- How to use the installed Lightroom Mobile Presets
For further info and screenshots scroll down or click on the link titles in overview.
Have fun!
1. Download the DNG file to your mobile device
The very first step, of course, is to download the Lightroom Mobile Preset onto your smartphone. The file format is supposed to be ‘DNG’ and the appearance of the files may be different on each device. Don’t be surprised because the files currently not showing thumbnails.
Head on and see how to easily install and use lightroom mobile presets …
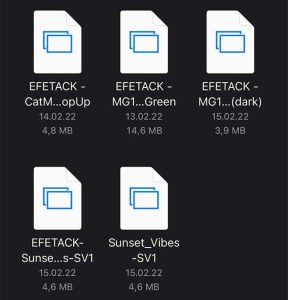
How DNG files look on mobile browser
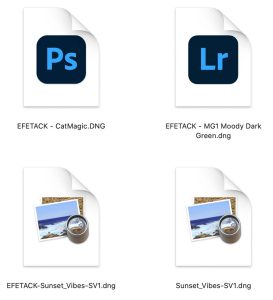
how they might look on your desktop
2. Open Lightroom Mobile App on your smartphone
Next open the Lightroom Mobile App on your smartphone. Alternatively you could click on the image in your photo gallery (Android) or Photos app (iOS/iPadOS) and choose “open in Lightroom Mobile”. For the purpose of this tutorial open the app first …
Lightroom Mobile App from iOS Screenshot
3. Import the DNG file into Lightroom Mobile App
… download the just downloaded DNG file into Lightroom Mobile app on your phone as shown in the images below by tapping the image import button.

Click the import button …

… on the bottom right corner
Repeated reminder: Please consider that DNG Files do not have a Thumbnail/Preview in your Gallery, they might show just a grey picture in your gallery and while importing into Lightroom Mobile App. They will be fully visible again after import. See below.
4. The imported DNG file will show up as an image in LR Mobile
Now you see the DNG image and the edited sections. Edited buttons have a white point showing below the icon. You can make further adjustments or continue to save this New Preset on your mobile.

Edited sections have a white dot below the icon
5. Click the three dots in the upper right corner and save Preset
Tap the three dots in the upper right corner within the Lightroom Mobile App to save it (Android users could have these settings in another corner on the screen).

Tap the three dots to save Preset

Name the Preset and make sure to checkmark ‘Masking’
Go ahead and save this Preset by clicking “Create Preset”. In the following window choose your options: you should definitely give the preset a name, favourably the one I (or the author of the Preset) have given it or choose your own memorable Name. Below the name you can create groups to organise your Presets. For demonstration purposes I made a group “animalistic” to put the MagicCat Preset in it.
Note: by default the ‘Masking’ checkbox is appearing empty. I recommend to checkmark it, thus the masks will be saved within the preset.
6. How to use the installed Lightroom Mobile Presets
The new Preset is installed and can be accessed via the “Presets” button in the bottom menu bar where you find currently the “Yours” tab. Clicking on it will show you all of the presets you have saved. These can be downloaded presets from others or ones you have created and saved yourself.

Tap the three dots to save Preset

Name the Preset and make sure to checkmark ‘Masking’
Now you have the Presets available on your mobile, eligible for any smartphone and any OS, from iPhone to Android phones! To apply all edits to any picture now you need just one click on the Created Preset. That’s it.
That was ‘How to easily install and use Lightroom Mobile Presets’!
I hope you liked the content. Was this helpful for you and has the explanation been easy-to-understand? Hopefully, YES! Appreciate your feedback.
Have Fun !
PS: I am convinced that it is possible to download, install and get the presets ‘ready-to-use’ in less than 1 Minute. This will vary depending on your internet-speed and on how you getting accustomed to the process of installing the preset. In my tests I had some attempts with bad wifi, where it took me between 1 minute and 30 seconds to 2 minutes to save the preset. I am sure with a little practice and a good connection you’ll get there. So, what is your experience? Can we do this in under 1 minute ??


Leave A Comment